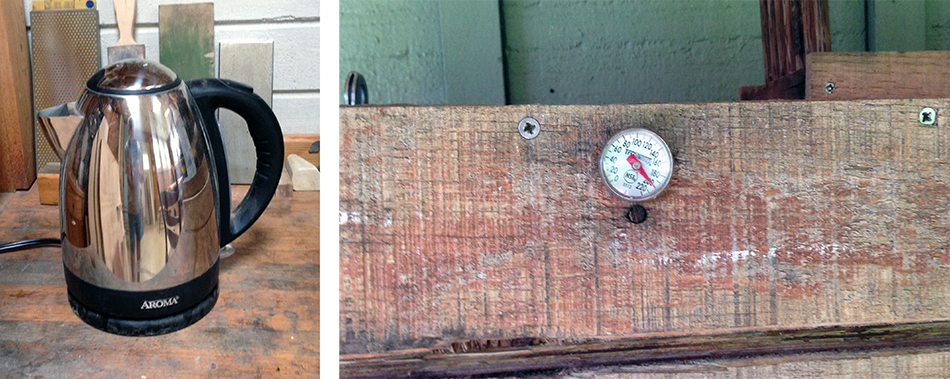
After the final, pre-bend milling of the rear legs they are now ready for the steam box. I like to start by adding boiling water, rather than cold water, to the steamers. This greatly accelerates the time it takes to get the steam box up to maximum temperature. I pre-boil the water in an electric kettle which holds about a half gallon, add it to one of the steamers, and repeat 5 more times until both steamers are full. In warm weather the steam box will get up to it’s maximum temperature of 200° in about 20 minutes. This is the maximum temperature that my thermometer registers under these conditions, but it may not be the actual temperature. Your thermometer may register a different maximum—just wait until the temperature stops rising before beginning to count the steaming time. I described my steam box set-up here. Of course you can use any source of heat and water container that will produce large volumes of steam.
Using the steamers
- When full, my steamers will run for about an hour and a half before needing more water
- Whenever adding water, I always boil it first, since adding cold water will lower the temperature considerably inside the steam box.
- It’s very important that the steamers do not run out of water. If they do, they will shut themselves off and the only way to turn them back on is to cool them off first by filling them with cold water several times.
- I always empty the steamers after I’m done. The one time I used water left over from a previous steaming session the day before, the oak slats I was steaming ended up getting stained pretty badly. I’m not sure exactly why this happened but I believe that the water left overnight reacted with the metal in the elements causing the same kind of staining you see from a rusty nail in an oak board.
- If it is very cold be sure to thaw out the hoses before steaming. This past winter I steamed a pair of legs one day and the next morning set up the steamers again to steam some slats. I went inside the shop and a few minutes later I saw tons and tons of steam outside the window. It turns out that water inside one of the hoses froze overnight, preventing the steam from going through the hose into box. The steam needed to go somewhere, and fortunately the steamers have an emergency release valve, which was where all the steam was coming from.
Steam time
- I begin counting the steam time when the temperature reaches maximum (on my thermometer it is 200°)
- Steam maple, cherry and walnut legs for 2 hours
- Steam oak legs for 3 hours
- Steam hickory legs for 3-1/2 hours
Moisture content
- The ideal moisture content range for bending is 12% to 20%. The maple legs I am bending today have a moisture content of about 18%.
- If the moisture content is below 12% you can improve the chances of a successful bend by steaming the legs for an hour or so the night before. After steaming, keep the legs in the steam box overnight and keep the steam box closed. Then in the morning steam as usual, and begin counting the steam time when the temperature reaches maximum.
- If the bending blanks have a moisture content much over 20%, I make the blanks about 1/16″ oversize in both width and height. The added dimension compensates for the additional shrinkage you can expect as the legs dry.
Steaming
- In the post on final milling, the last thing I did was label the front face at the bottom of the leg with the word “UP”. Once the steam box reaches maximum temperature, I always put the legs into the steam box top of the legs first, with the front face (tapered side) facing up. Being consistent in this helps me keep the leg blank oriented correctly when I’m ready to put it into the bending form.
- Close up the steam box and steam for the proper time for the species you are bending. In my case, I will steam the maple legs for 2 hours.
Bending
Heating wood to 200° or more with steam helps to loosen the lignin, a natural adhesive that holds wood fibers together, and allows the wood to bend and retain it’s shape after it has cooled and dried. In general, wood has a much greater capacity to compress rather than to expand. Wood fibers on the inside of the bend will compress. Wood fibers on the outside of the bend will want to expand and are more likely to break. A bending strap can prevent expansion of the outside fibers reducing the likelihood they will break. For the bending strap to be effective in preventing expansion it is critical that the leg be held very tightly between the two stops in the strap assembly.

Here is a video that shows the complete bending process. Each leg takes about 3 minutes start to finish. Or view directly on YouTube.
Drying
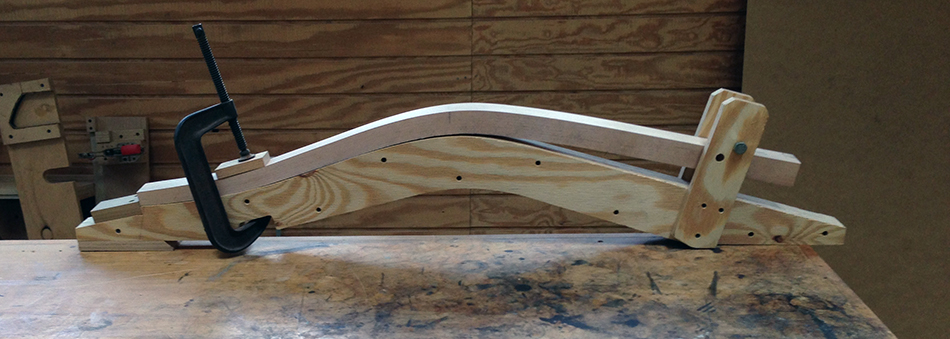
Initially the leg is overbent. The purpose of the overbend is to deform the fibers which reduces the likelihood of spring back as the fibers relax to their final shape while drying. I leave the leg in the overbent position for a few hours as shown here.

After several hours I move the pin to the upper position in the gusset and allow the leg to rise to it’s final shape as it dries.

Another option is to move the leg to a drying form. The drying form is identical to the bending form except that it has no bending strap. The only other difference is the position of the pins in the lower gusset—they are 1″ lower compared to the bending form to compensate for the lack of the handle assembly. There are a couple of reasons to use a drying form. The first is that I only have two bending forms and I might need them to bend more legs. Secondly, the drying form exposes more wood to the surrounding air, which can aid in drying.
Since I do a lot of bending I built a dedicated drying closet into a corner of my shop. The dimensions were determined by the space I had available—approximately 27″ wide by 18″ deep. If I had more space I would probably make it a little larger. It can hold a maximum of 3 pairs of legs, but usually I dry a pair or two pairs of legs along with their slats. I insulated the two walls with 1″ Styrofoam. The wall on the left has a 1″ gap at the bottom and the top to facilitate air movement (I’m not sure if this actually works, but it seems like a good idea). The heat source is a small oil filled radiator. I generally try to maintain a temperature of around 100° or so. Under these conditions most legs will be dry and ready to work in about a week. Soft maple dries very quickly and will probably be ready in a few days. On the other hand I have had some oak legs take two weeks or more to dry. As you can see here I have transferred the legs to a drying forms.

It is not necessary to have a dedicated drying closet like this. Find a warm spot, such as a furnace room or behind a wood stove in winter, and dry the legs there. If you don’t have a warm spot the legs will simply dry more slowly. During the first class I took with Brian, we even dried slats in the back of someone’s hatchback on a sunny day.
Next up in the blog I will mill slat blanks prior to steam bending.
Side Chair Build Series Links:
- Next Post: Prepare Slats for Steam Bending
- Previous Post: Steam Bending, Part 1 — A Simple Steam Bending Set-up