Day five is very busy and very satisfying.
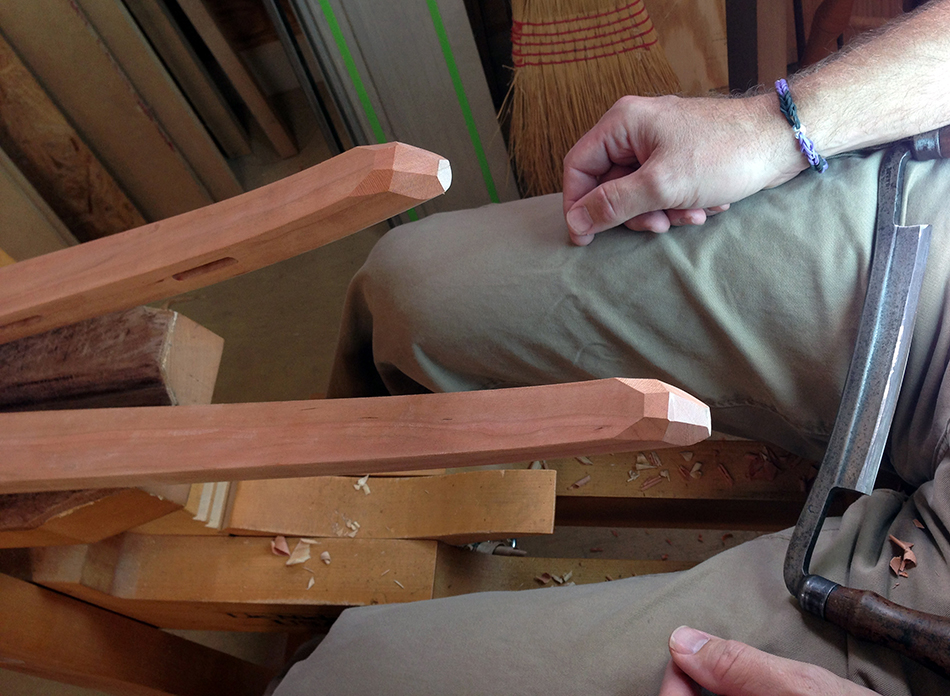
We begin the day by shaping the ears at the top of the rear legs. I always have students practice on spare stock first. Only when they are comfortable with the process do they move onto shaping their actual legs, as David is doing here. You can see his practice pieces lying on the stool.
Here are the final shaped ears on Mark’s rear legs. All of the shaping was done with a drawknife which leaves a beautiful, smooth surface. I really like the bold facets.
The next step is drilling the side rung mortises into the assembled front panel. This simple step jig elevates the opposite leg a different amount for each mortise using a system call rise-and-run to quickly calculate the height of each step. The process is easy to use and very accurate.
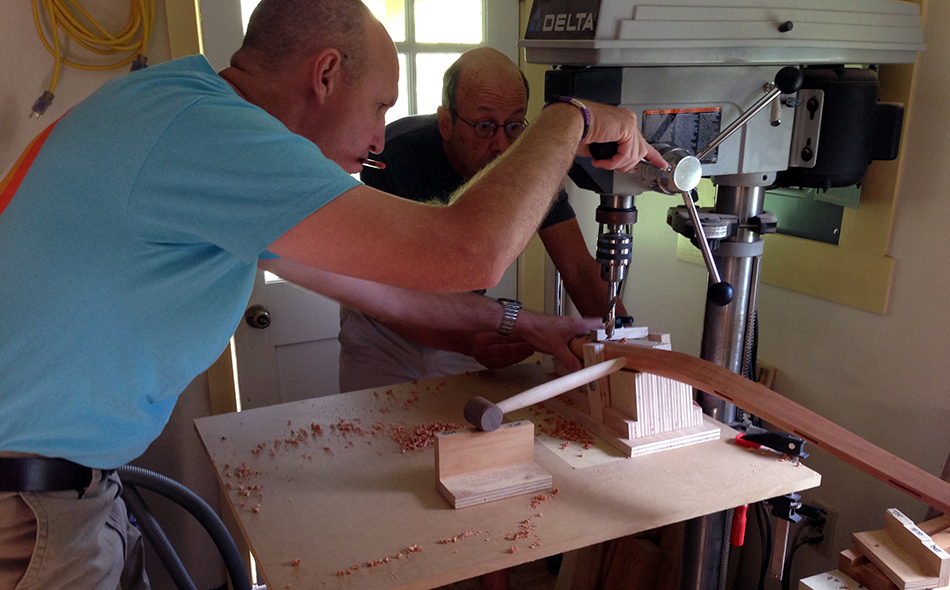
Because a fully assembled rear panel would be quite awkward to place on the drill press table in the correct orientation Brian has developed this three part jig that allows drilling into an individual leg. The platform angle accounts for the backward splay of the rear leg. The joy stick acts as a substitute for the rear rung and the opposite rear leg. In combination with the step jig, the joy stick is used to rotate the rear leg to the correct angle for each mortise. As with the front panel, the height of each step on the step jig is calculated using rise-and-run.
Here Mark is using the three-part platform jig to drill the middle side rung mortise into one of the rear legs.
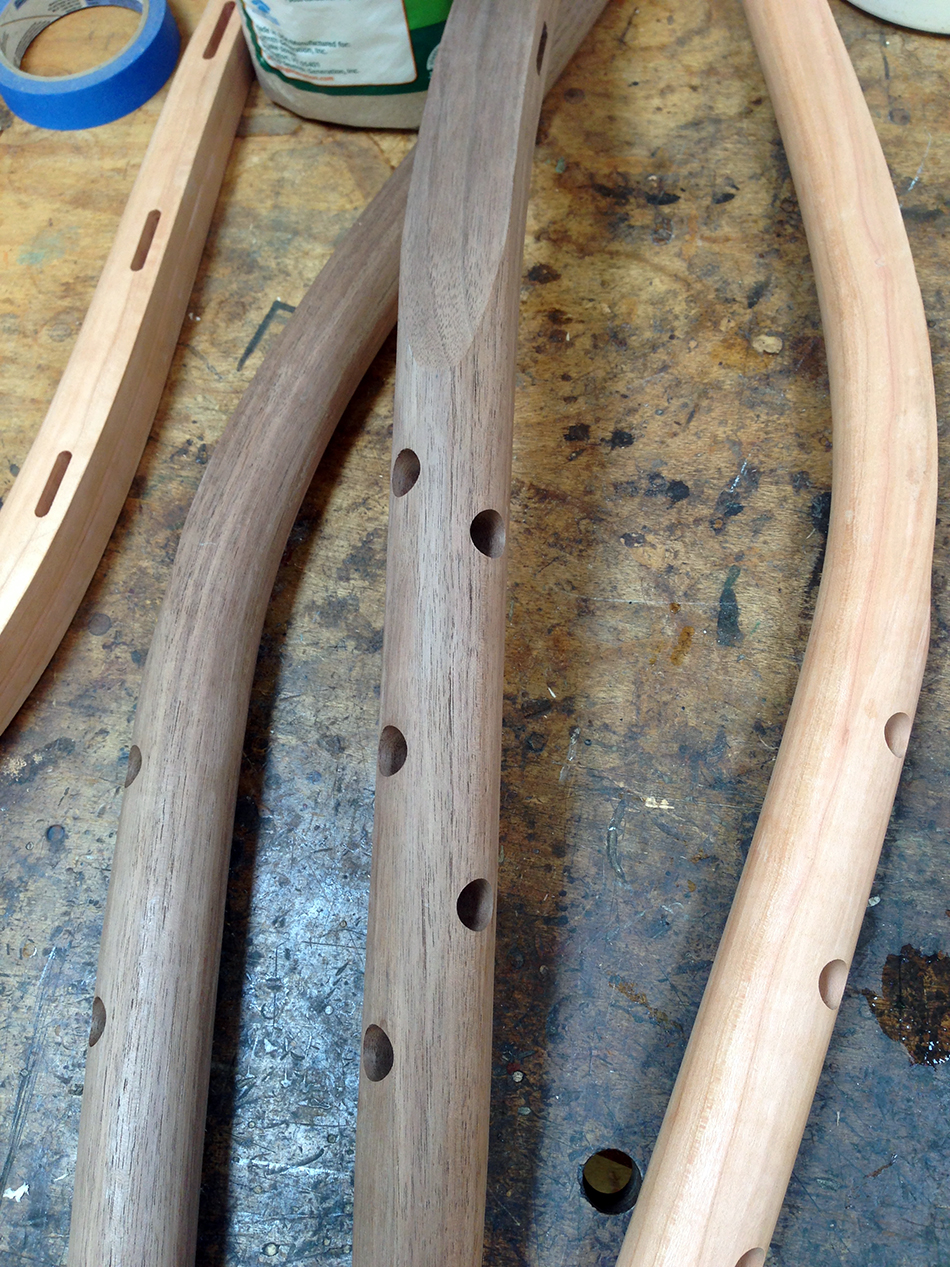
Here is a rear leg with the three side mortises and two rear mortises. I am always amazed that we can drill these five mortises, each at a different angle, into this round, curved part. Although there is not one 90° angle in any of the 20 rung mortises, the drilling process itself is quite easy and goes very quickly.
After the rung mortising is complete we trim the top of the front legs to length. Here Mark is adding an hexagonal chamfer using a block plane.
We are now ready to begin final assembly. Here are all the parts for David’s chair. In a half hour or so it will be completely assembled.
We begin by assembling the rear panel. This is the most difficult part of the assembly because we are dealing with seven individual parts that all need to come together at one time. We use the same assembly jig as we did for the front panel, only changing the wedges to match the side-to-side splay of the rear legs. That’s me with the full head of hair!
Next we drive the side rungs into the front panel.
And finally we add the assembled rear panel to complete the chair. You’ll notice some string around the top rear leg. This leg developed a very small split when we were assembling the rear panel. We wrapped the string tightly around the leg at this point to prevent the split from opening up during final assembly. David will most likely fill this small split with CA glue mixed with walnut saw dust.
The two assembled chairs. Excellent work for students who never used a drawknife before this class. The four seat rungs are made from hickory rather than the softer cherry or walnut. The seat rungs will be under enormous pressure from the hickory bark seat and must be made from a very hard wood.
There is still enough time left in the day to install and carve the pins. David is using a custom knife I made specifically for this purpose.
Here are the carved pins on each chair. For me, one of the wonderful things about this chair is how all of these small details work together to form a beautiful, strong chair that is a joy to sit in.
First thing tomorrow Mark and David will finish construction of the chair by leveling all four legs. The rest of the day will be spent weaving a hickory bark seat.


