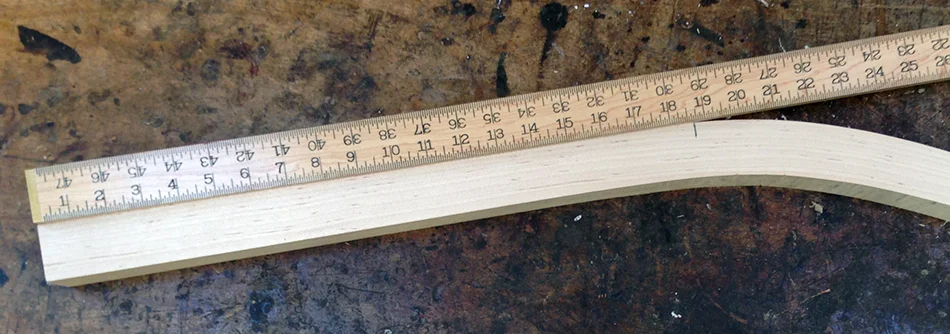
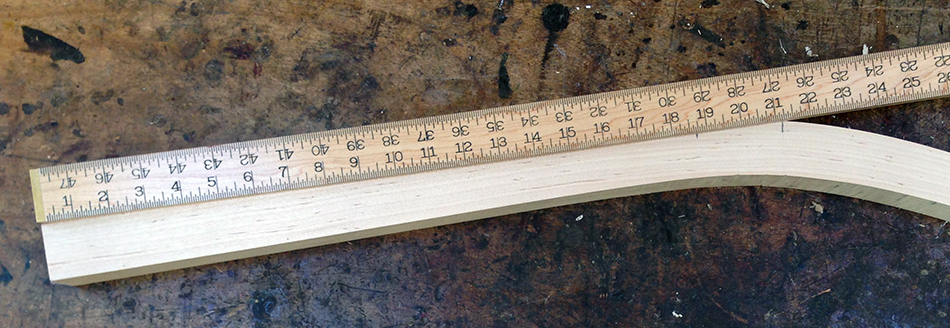
Now that I have flattened, thicknessed, and trimmed the rear legs to length they are ready for the final two steps prior to slat mortising. The first step is to cut a relief cut into curved upper front face of each leg. This begins with laying out the cut.
First I put a mark at 18-3/4″ from the bottom of the leg.
Followed by a second mark at 21-1/4″ from the bottom (or 2-1/2″ from the first mark).
On the second mark I put a cross mark 1/4″ from the front face.
Using the other leg as a template I draw an arc from the point where the first mark intersects the front face to the cross mark.
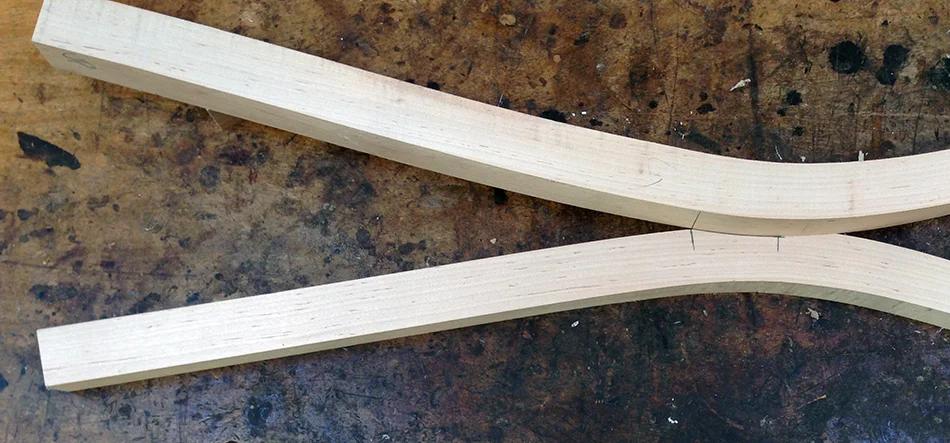
Now I place the second leg on top of the first and align the tops and front faces of each leg as shown on the right side of the photo. Then I rotate the top leg down and align it with the cross mark as shown towards the left. Finally I use the top leg as a template to draw a line from the cross mark to the top front of the bottom leg.
Here is the layout for the relief cut. I always make sure to layout the relief cut on both legs before proceeding any further.
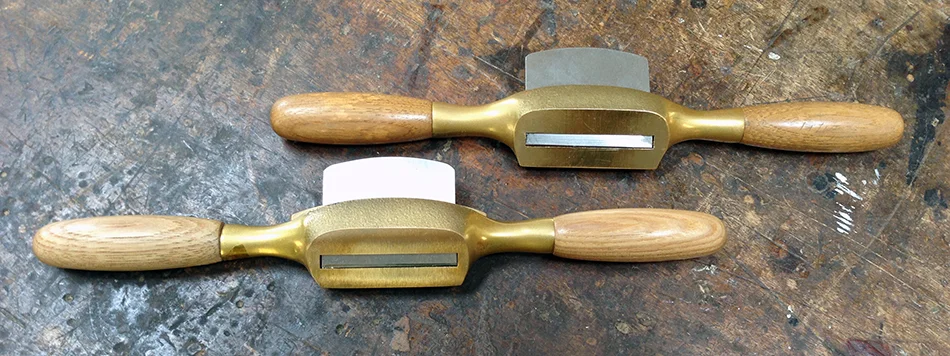
To make the initial relief cut, I saw just outside the layout lines using a band saw. Then I use a spokeshave to remove the band saw marks and fair out the curves. There are two spokeshaves that I use for most of the shaping of the chair. Brian has designed both of these shaves specifically for this type of work. They are manufactured and sold by Lie-Nielsen and are highly recommended. The two shaves look very similar, but there’s an importance difference. The shave on the right has a flat sole and is used on flat or convex surfaces. The shave on the left has a curved sole with a 5″ radius and is essential for working on concave surfaces. I like to use both shaves, but if you can only afford one, get the curved bottom—it can be used on all surfaces whereas the flat bottom will not work on concave surfaces. Brian has a very good video, Drawknives, Spokeshaves and Travishers: A Chairmaker’s Tool Kit where he demonstrates how to use and sharpen a variety of chairmaking tools including these two shaves. This DVD is no longer available, but you may be able to find on eBay or other online sources.
Here is the leg with the relief cut made. I am now ready for the final step prior to slat mortising which is cutting a taper on the inside face of each leg.
Up until this point, each of the rear legs is identical and could be used on either the right or left side of the chair. In cutting the taper on the inside face I am now setting the position of each leg in the final assembly. If you remember from the post on prepping the rear legs for steam bending, one of the considerations in cutting out the blanks was having the long grain on the top half of the front face of each leg slope from the outside towards the inside. In these photos I have highlighted the long grain with pencil so you can see it better. On the left you can see how the long grain slants gently from the outside towards the inside of the leg. This is done purely for visual purposes. The photo on the right shows the legs roughly oriented the way they will be in the final chair. The visual movement of the long grain complements the physical orientation of legs. Now that I have determined the position of each leg I am ready to layout and cut a taper on the inside face of each.
In this series of photos I have turned the legs upside down so that you are looking at the back face. Make sure to keep the inside faces towards the center. I do the layout on the back simply because it is easier to make this cut on the band saw with front face down on the band saw table. Beginning with the photo on the left, at the top of each leg I have marked 1″ from the outside face. There is also a mark 18-3/4″ from the bottom, which is the same point that the relief cut begins on the front. After marking these points, I place one leg on top of the other at each point in order to draw the taper. On the right you can see the taper cut laid out on each leg. Once I make the taper cut there is no going back, so I always confirm that the taper is on inside face. I normally cut the taper on a band saw, but if you are accustomed to it, there are a couple of different ways to cut the taper on a jointer.
After carefully cutting the taper on a band saw I am ready to finish the surface with a jack plane. The only tricky part of this process is getting a smooth transition at the point where the taper meets the flat surface at the bottom portion of the leg. I have found that I need to skew the plane at quite a severe angle in order to smooth out this transition as shown in the photo on the left. Once that is done I reduce the skew angle of the plane so that most of the length of the plane contacts the leg. This allows me to get a nice flat surface since the plane will skip over any small dips. I continue planing until the taper is one continuous flat surface.
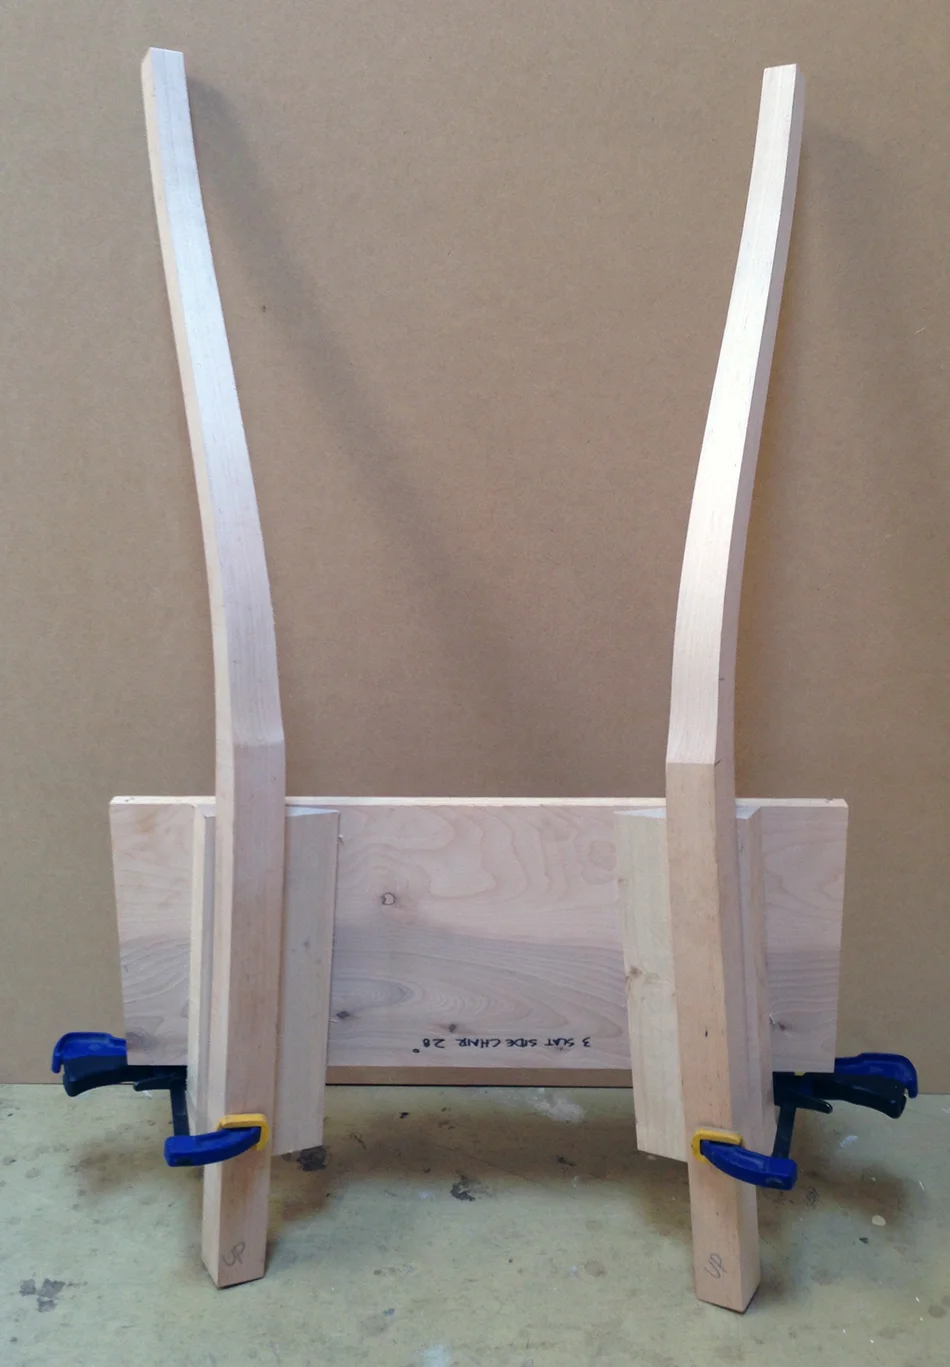
Here are the rear legs ready for slat mortising. At this point you can start to visualize how the rear panel will look. The jig you see in the photo holds the legs in the same orientation as they will be in the final chair by rotating them to the correct angle and holding them the proper distance apart. I will be using this jig when I layout the slats and fit the slat tenons to the mortises in the legs.
Side Chair Build Series Links:
- Next Post: Chair Design, Part 1
- Previous Post: Post Bend Shaping: Rear Legs, Part 1
