In the last post I demonstrated how to precisely fit a slat tenon on the top slat to its mortise in the rear leg. The final steps in fitting the slats involve not only fitting the remaining five tenons to their mortises, but also evaluating the overall relationship of the parts making up the rear panel assembly and making adjustments where necessary. This is a fun part of the process because it’s the first time that the assembled parts actually start to look like a chair.
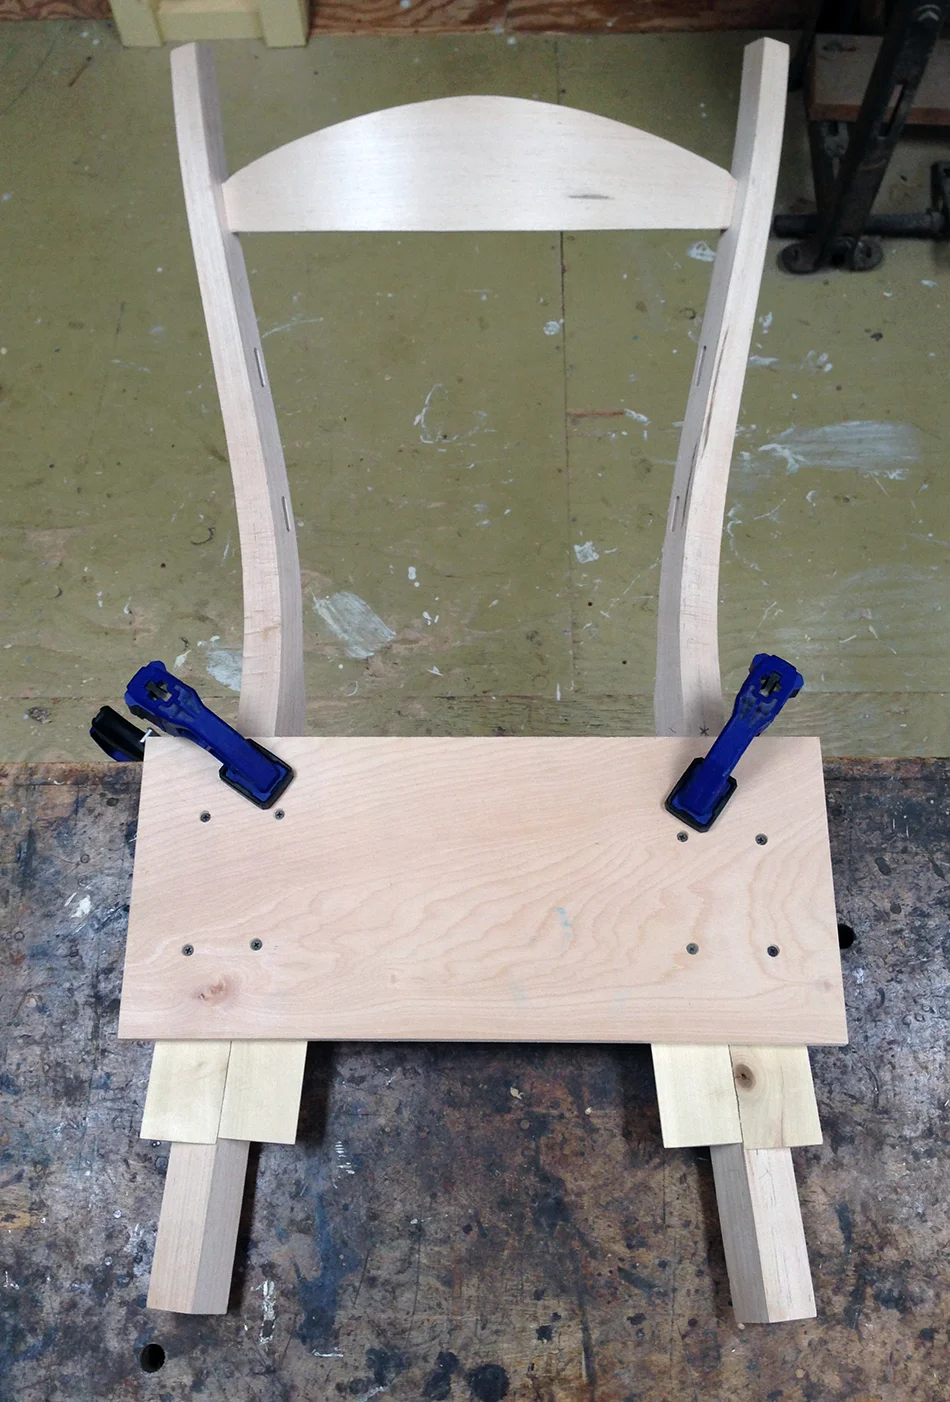
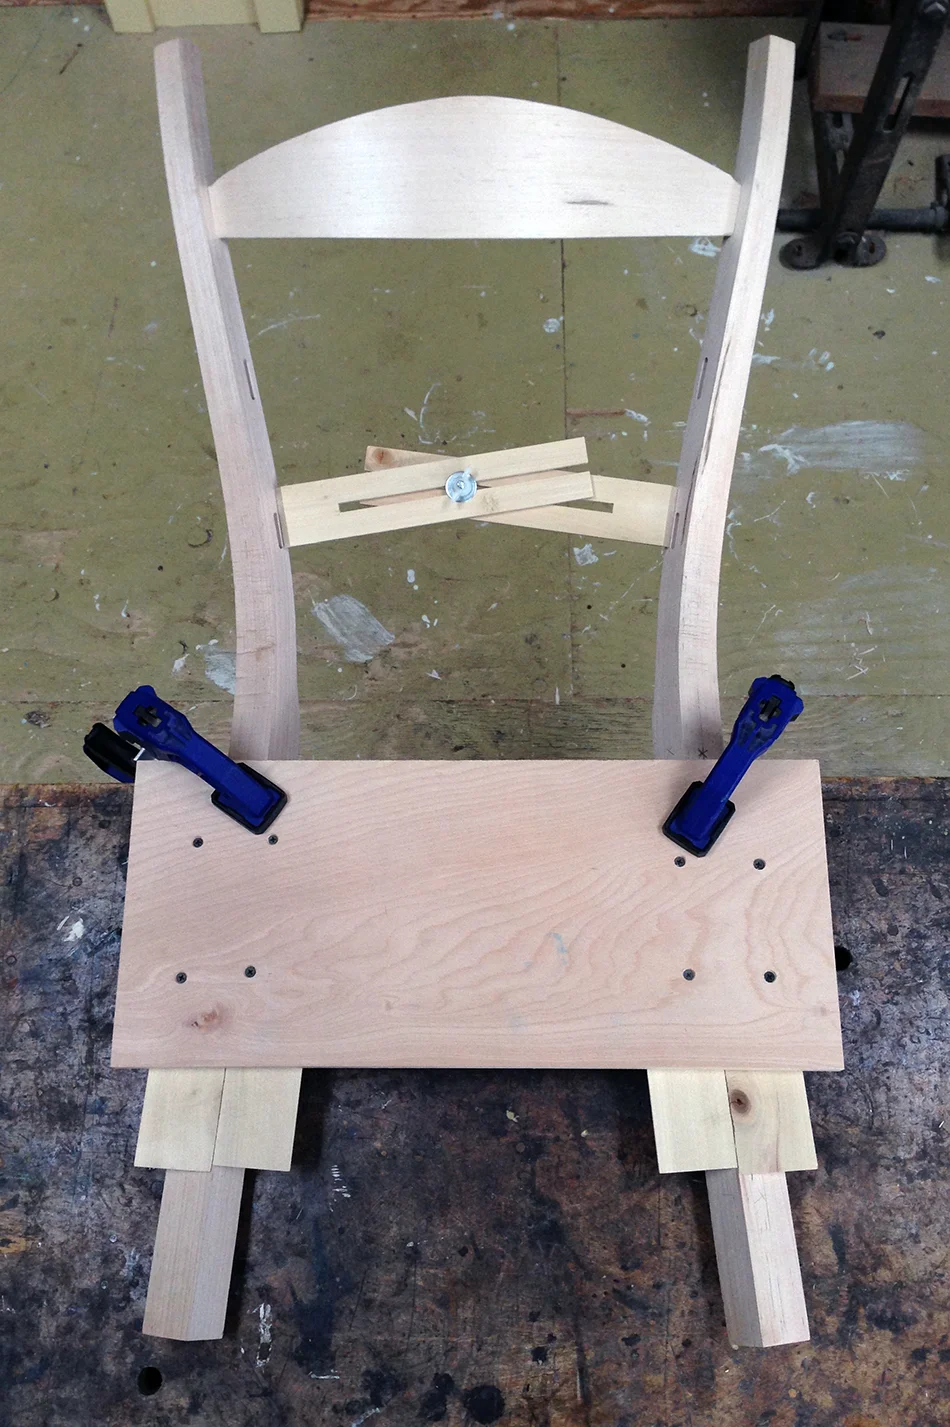
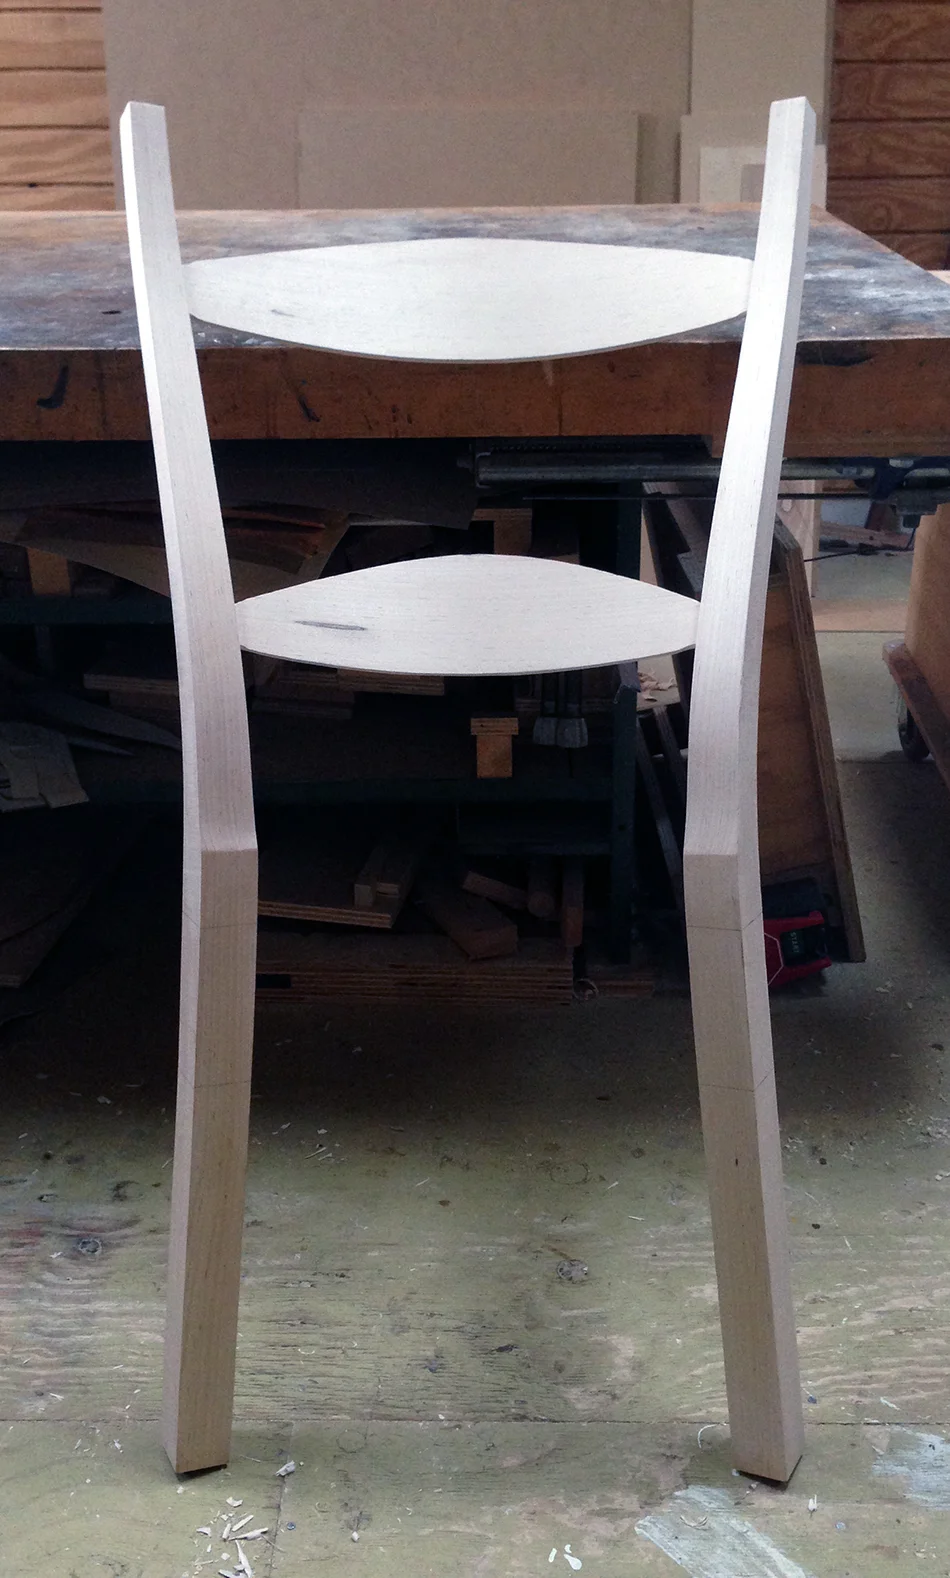
I begin by fitting the second tenon of the top slat to its mortise and dry fitting the slat to the rear legs. I’m mainly interested in seeing how well the tenons fit the mortises. I can’t really evaluate the overall shape of the rear panel assembly because, without the lower slat in place, it is too easy to move the legs closer together or further apart. This is what the assembly looks like at this stage.
Next I place the assembly back into the holding jig, aligning the rear seat rung location on each leg with the edge of the jig as I did before. This puts the rear legs into the same position they will occupy in the final chair.
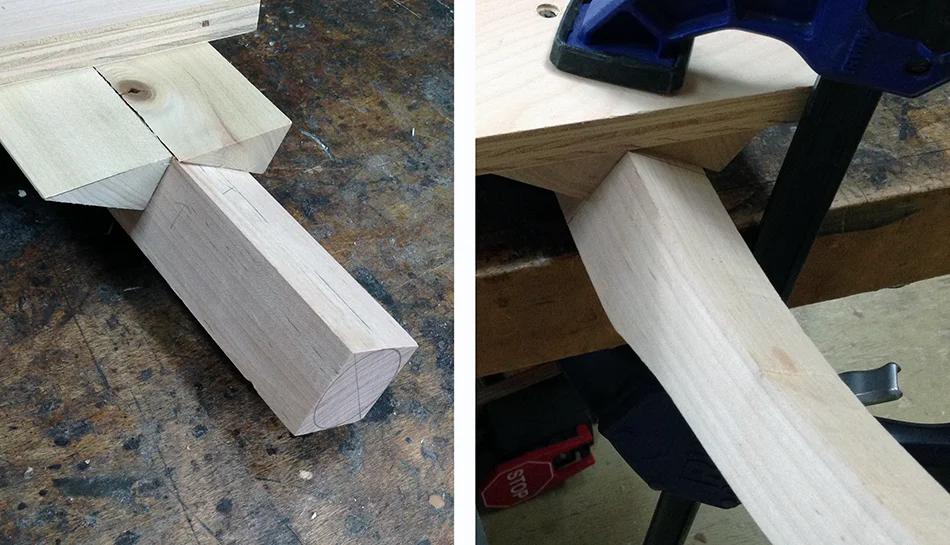
The primary thing I want to check at this point is to see if the legs fit tightly into the support blocks. If they do it means that the top slat is rotating the legs the correct amount and that the legs are the correct distance apart. Here you can see that the legs fit nicely, without gaps, into the support blocks.
The next step is to measure for the bottom slat using the same process I described here.
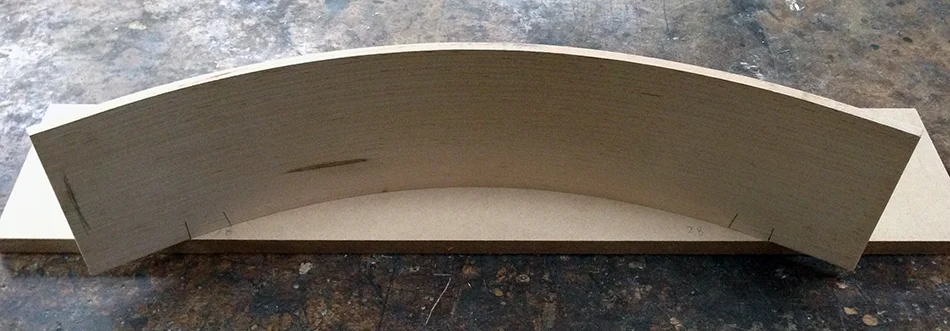
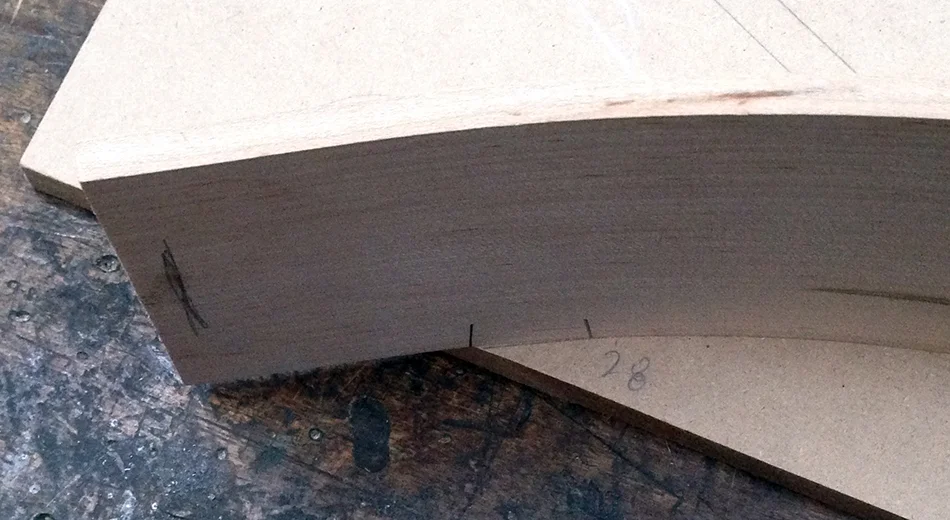
After measuring for the bottom slat I transfer the overall dimension to the slat blank and check the angle at the outside edge of each tenon against the 28° angled lines drawn on this board using the process that I described here.
If you look carefully you’ll see that the angle of the slat blank matches the 28° angled line very closely.
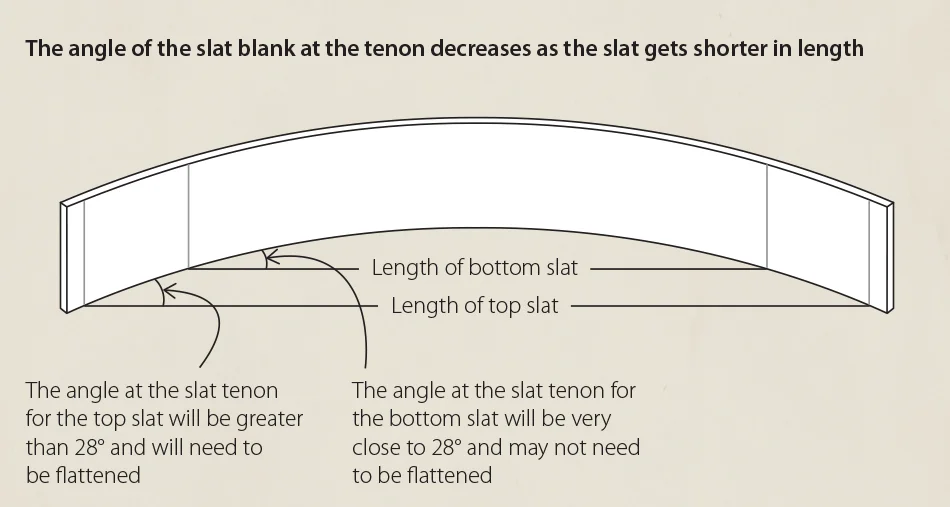
If you remember from this post, when I did this same angle check on the top slat, the angle of the slat blank was greater than 28° and needed to be flattened. The reason for this is that, as the length of the slat gets shorter, the angle of the blank at the tenon decreases as shown in the illustration below. Knowing this, when I bend the blanks, I need to make sure that the angle will be large enough for the smallest slat. Since all the blanks are bent to the same arc this means that the longer slats will have a higher angle at the tenons than is necessary and will need to be flattened.
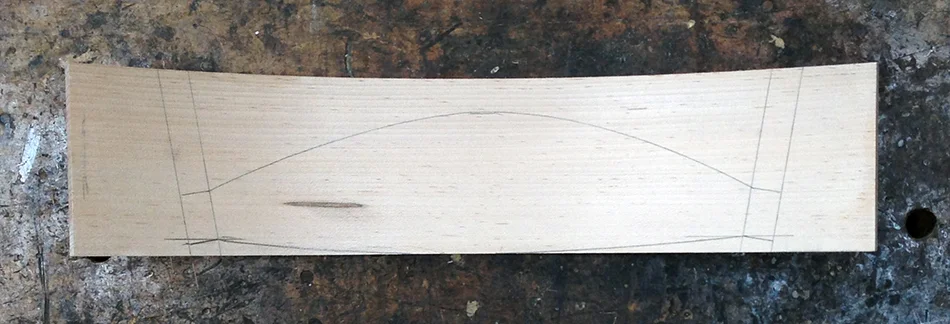
After checking the angle of the blank I use the measuring jig to transfer the tenon shoulders to the blank and layout the shape of the slat as described here.
Next I saw out the profile of the bottom slat.
After fitting each tenon on the bottom slat to its mortise I am ready to dry assemble the rear panel. I start by putting one tenon on each slat into one leg. Then I put the opposite leg onto the remaining slat tenons and squeeze. Because the slats enter the legs at an angle I also need to put pressure on the back of the slat with my forearm as I squeeze the legs together. Since I will be evaluating the overall relationship of the parts of the rear panel assembly it’s very important that the slat tenons are fully seated in the mortises so that I can get an accurate read on the distance between the legs at both rung locations. I can tell whether the tenons are fully seated by checking that the shoulder line I drew on the back of each tenon is in-line with the surface of the leg.
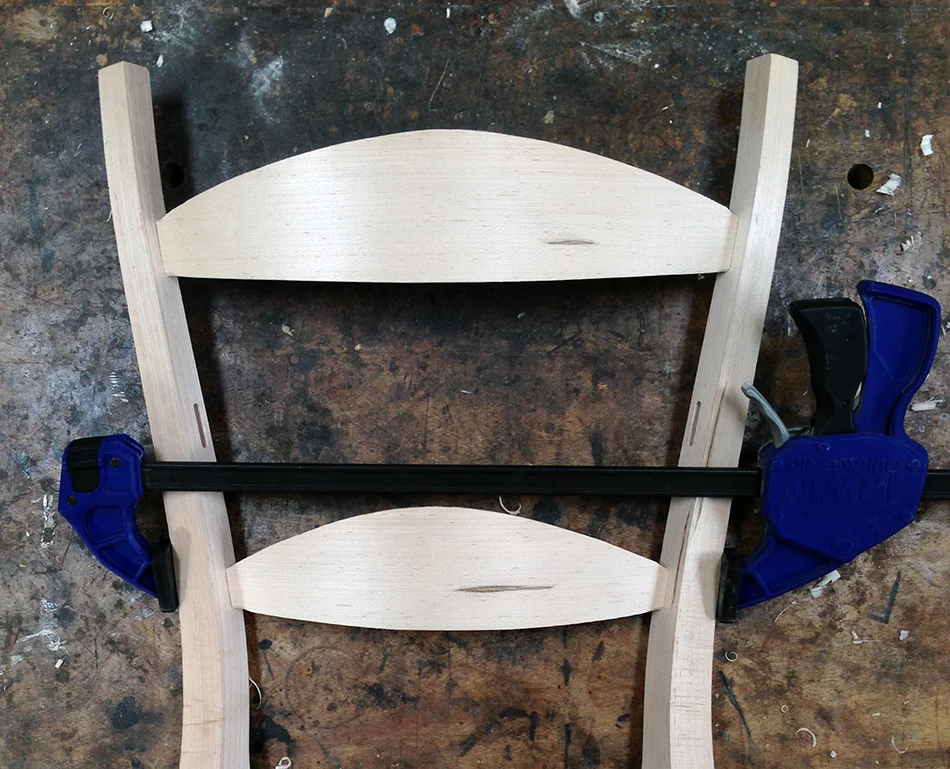
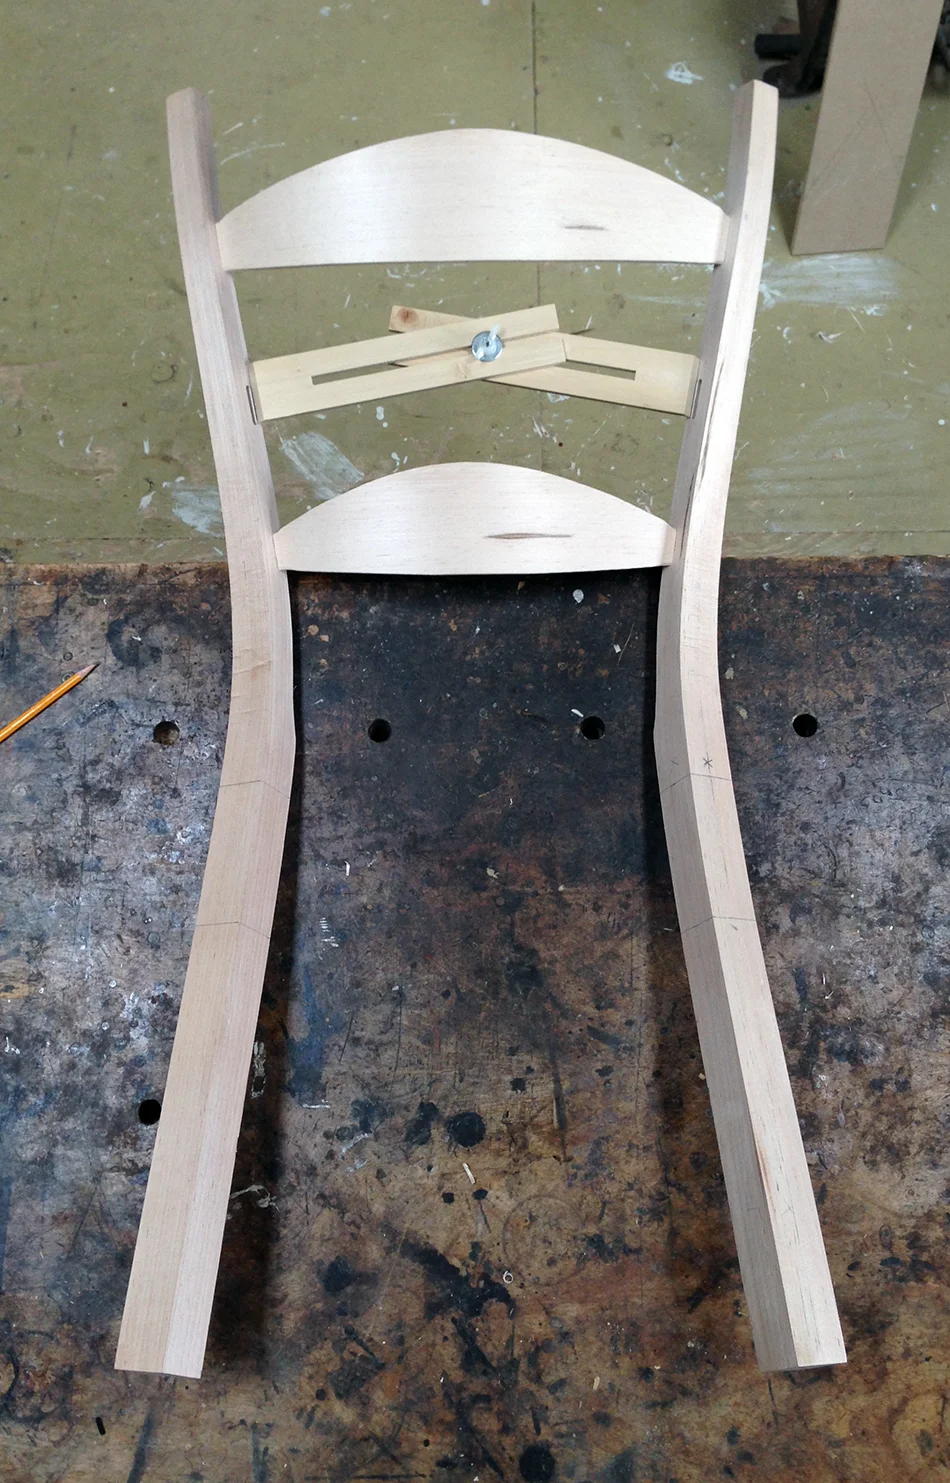
With tight fitting tenons it can sometimes be difficult to fully seat the tenons simply by squeezing the legs together. To help with this I sometimes clamp the legs in-line with the slat as shown below. I use just enough clamping pressure to bend the slat upward a little bit. Then I bang on the back of the slat with my fist until the tenon fully seats in the mortise.
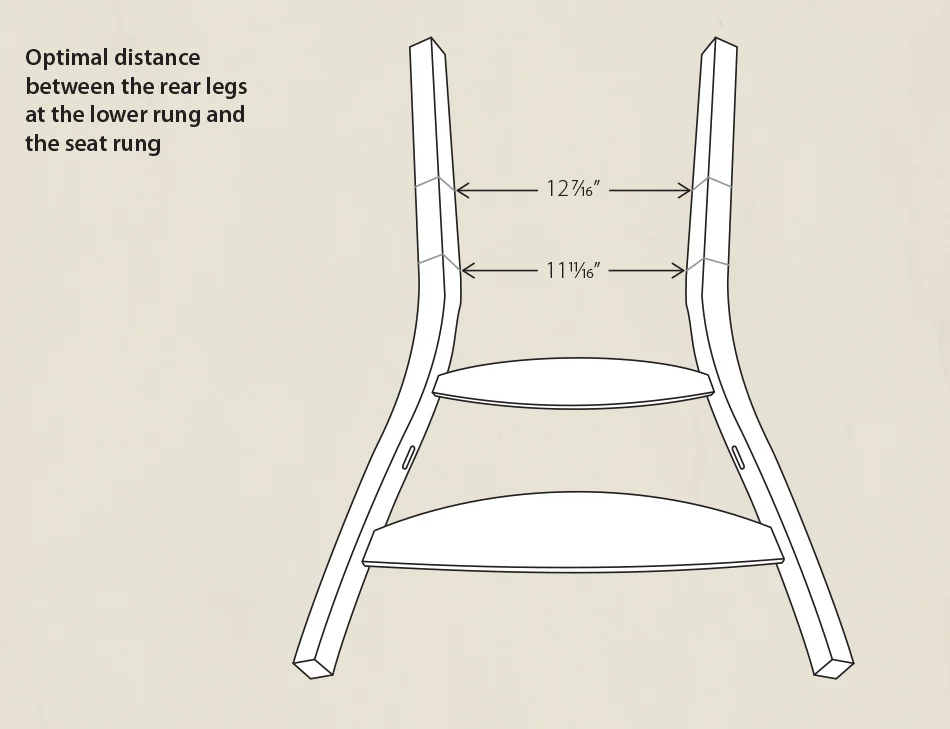
The next step is to measure the distance between the legs at the rear seat rung and at the rear lower rung. If you remember from this post, based on the length of the rear seat rung, the depth of the mortise and the diameter of the leg, I determined that the distance between the rear legs when they are round is 12-1/4″. I used the illustration below to help me build the support jig that holds the rear legs in the same position as they will be in the final chair. I can also use this illustration to determine the distance between the square legs at the seat rung.
Knowing the distance between the legs at the seat rung (11-11/16″) I can simply add 3/4″ to get the distance between the legs at the lower rung (12-7/16″). Remember that the lower rung is 3/4″ longer than the seat rung. I will use these two measurements to check and see whether the overall relationship of the rear panel assembly is correct.
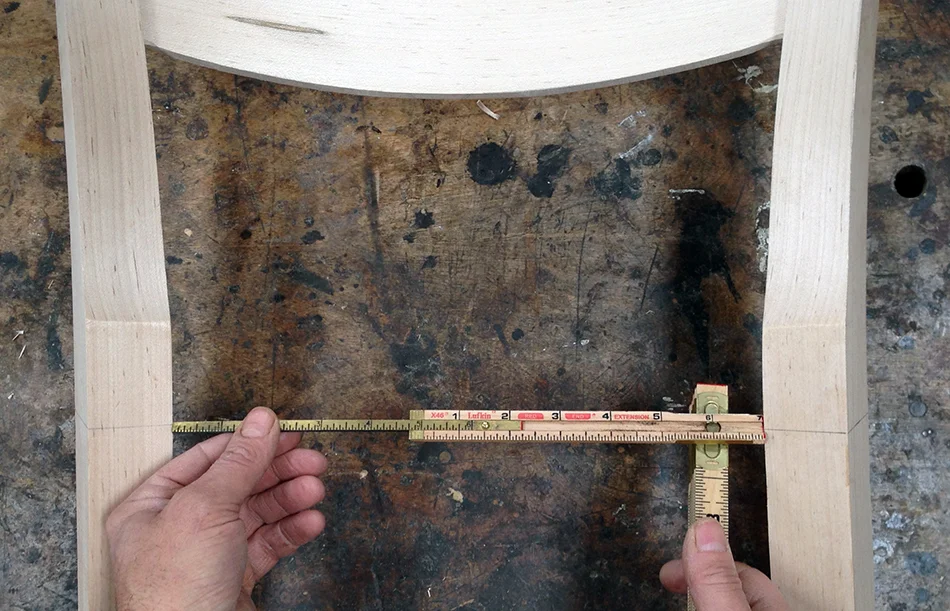
Here I am using a folding extension rule to check the distance between the legs at the seat rung.
My target at the seat rung is 11-11/16″ and the actual measurement is 11-3/4″ so I’m only 1/16″ too wide. Using the same method, I measure the distance between the legs at the lower rung. My target there is 12-7/16″ and the actual measurement is 12-1/2″. Again, only 1/16″ too wide. The rear panel assembly is actually very flexible and the 1/16″ extra distance will easily be taken up at assembly when clamping the legs together. I am generally satisfied if I get to within 1/8″ of the target measurement. So, fortunately for me, for this pair of legs, I am ready to move onto fitting the middle slat.
Unfortunately for you is that I don’t get to demonstrate how to adjust the fit of the slats if the distances between the rungs are greater than I’m comfortable with. So, instead, I will describe a few common scenarios and how to deal with them.
Seat rung distance is good, but lower rung distance is too wide. What this means is that the side-to-side splay of the rear legs will be too great. Based on the difference in length between the seat rung and lower rung I am looking for a difference in distance between legs at each rung location of 3/4″. I often see a difference of 1″ or more. The solution is to decrease the rotation of the legs. I accomplish this by flattening the angle of the top slat (and sometimes the bottom slat as well) a couple of degrees or so. The effect of this is to bring the legs closer together, but the amount of reduction in distance varies depending on how far down the leg I am measuring. The seat rung location represents the closest distance between the two legs, so you can think of it as a pivot point with the top and bottom flaring out from there. If you make a change in rotation at the top it will affect the distance between the legs at the bottom, but it will not effect the distance at the pivot point (the seat rung location). I know this sounds complicated but it is really quite simple. You can actually see this happening by putting a clamp on the legs at the bottom rung location and applying some clamping pressure. As you do, watch the top slat — it will get flatter as the legs get closer together. You can also measure the distance between the legs at both rung locations — you should see a greater reduction in distance at the lower rung location compared to the seat rung location. I am generally satisfied if I can get the difference in distances at each rung location to within 7/8″ (or 1/8″ greater than the 3/4″ optimal difference). This extra 1/8" will easily be taken up when the legs are clamped together at assembly.
Seat rung and lower rung distance are too wide by the same amount. In this case the side-to-side splay is correct, but the legs are too far apart. Usually the place to start in this situation is to shorten the length of the bottom slat. The question is how much. Because the legs slant inward from the bottom slat to the seat rung there is not a one-to-one relationship between the reduction in slat length compared to the reduction in distance at the seat rung. In other words, if I trim 1/8″ from both tenons on the bottom slat (1/4″ total reduction in length) I will get a greater reduction in distance between the legs at the seat rung. I generally err on the side of taking off too little, check the result, and take off more if necessary. I like to get the distance between the legs at the seat rung as close as possible to optimal but the distance between the legs at the lower rung can be off by up to 1/8″.
Seat rung distance is too wide and the lower rung distance is too wide by a greater amount. In this situation we have both problems described above — too much distance between the legs and too much side-to-side splay. Essentially I would employ both solutions, starting with decreasing the distance between the legs by shortening the length of the bottom slat. Next I would do a dry fit to check the measurements. If the distance at the seat rung is good, but the distance at the lower rung is too wide, I would continue adjusting by flattening the top slat until I get measurements that I am happy with.
Seat rung distance is good, but the lower rung distance is too narrow. This situation does not occur very often but it can happen. It is essentially the opposite of the first problem described above where there is too much side-to-side splay between the rear legs. In this case there is too little side-to-side splay. The solution is to increase the rotation of the rear legs by increasing the angle of the slat tenons on the upper slat (and maybe the lower slat as well). I then check the measurements and continue adjusting until I am satisfied with the result — again generally to within 1/8″ of optimal.
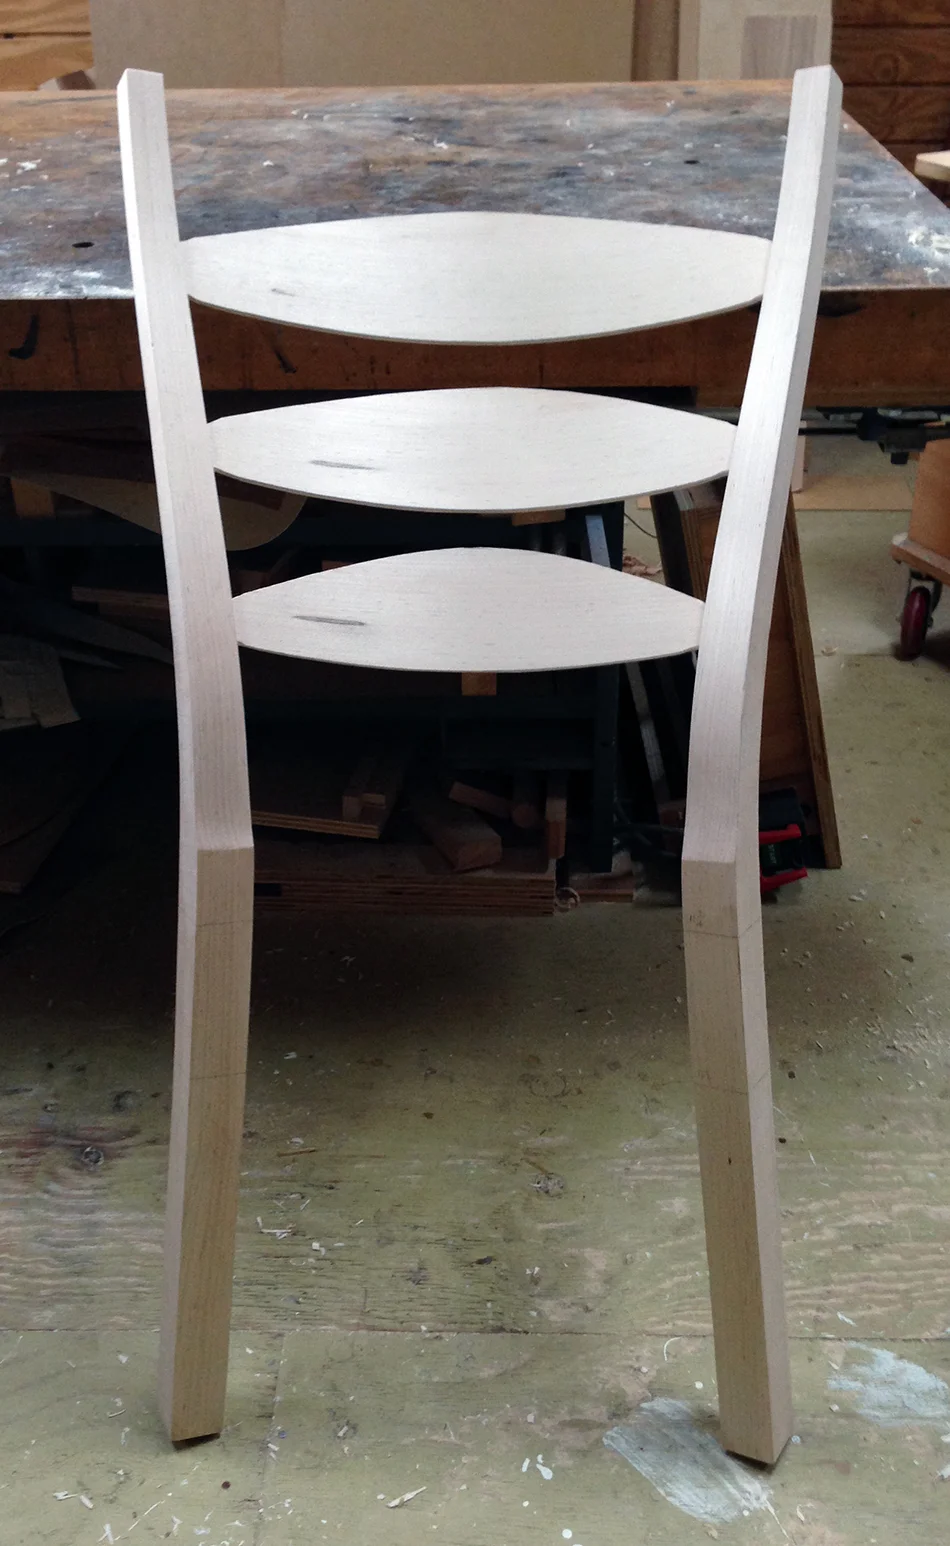
Here is the rear panel assembly at this point. I am now ready to fit and add the middle slat. Before I do that I like to record the actual distances between the legs at each rung location. I usually just write them directly on the leg. That way, when I add the middle slat, if either of the measurements change I know it’s the middle slat that is the problem.
To measure for the middle slat I simply place the rear panel assembly on the bench and use the measuring device to record the angle of the tenon shoulders and the distance they are apart. Then I layout out the slat, saw it out, and fit both tenons to the rear legs.
Next I reassemble the rear panel with all three slats and once again check the distances between the legs at each rung location. In this case the measurements stayed essentially the same, so I am finished with slat fitting. If the distances between the legs increased the culprit is the middle slat and the solution is to shorten the length of the middle slat slightly.
The parts are finally beginning to look like a chair!
I teach how to build this chair in a six day class. Every post in the side chair build series up until now (19 posts so far, including this one) describe processes that I teach, and that the student completes, in the first two days of class. After getting to this point we move onto hand shaping — first the front legs, followed by the rear legs. After that is finish shaping the slats and turning the rungs.
In the next post I’ll talk about the tools used in hand shaping the front and rear legs.
Jeff Lefkowitz
Side Chair Build Series Links:
- Next Post: Hand Shaping, Part 1: Tools
- Previous Post: Fitting Slats, Part 3

